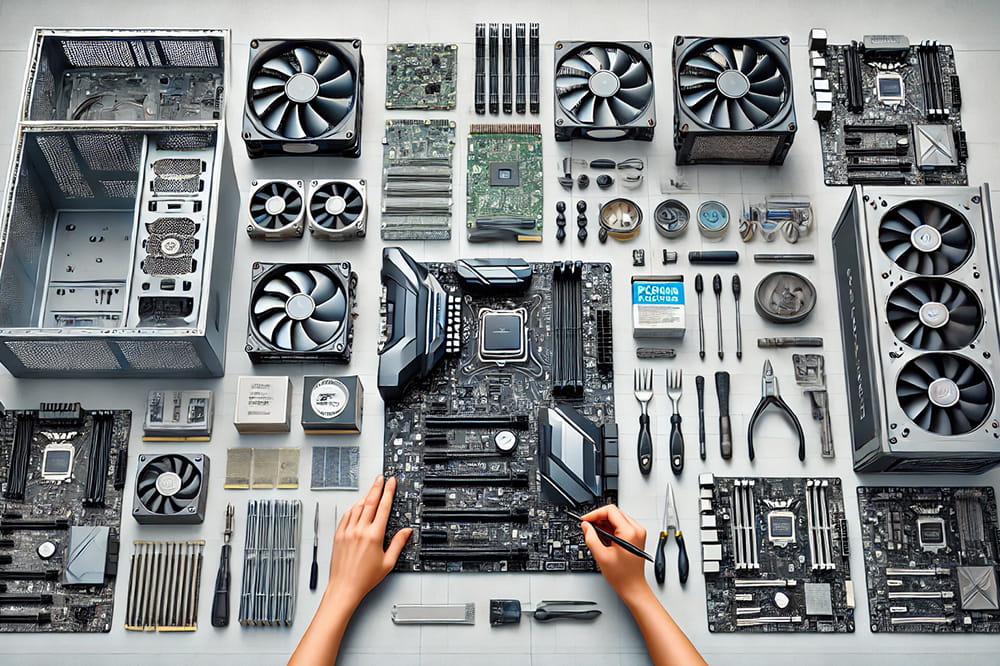
Building your own gaming PC is an exciting and rewarding experience. Not only does it allow you to customize every component to suit your needs, but it can also be more cost-effective than buying a pre-built system. In this step-by-step guide, we’ll show you how to build a gaming PC from scratch, from selecting components to final assembly.
Discover our range of PCs in the following link.
What Do You Need to Build a Gaming PC?
Before you start, make sure you have all the necessary parts and tools. Here’s a list of the key components you’ll need to build your gaming PC:
Main Components:
- Processor (CPU)
- Motherboard
- RAM (Memory)
- Graphics Card (GPU)
- Storage (HDD or SSD)
- Power Supply (PSU)
- Case
- Cooling System (Fans or Liquid Cooling)
Tools Required:
- Phillips head screwdriver
- Anti-static wrist strap (optional, but recommended)
- Thermal paste (if not pre-applied to the cooler)
Step 1: Preparation and Choosing Your Components
1.1. Processor (CPU)
The processor is the brain of your PC. For gaming, an Intel Core i5/i7 or AMD Ryzen 5/7 is ideal. Make sure it’s compatible with the motherboard you choose.
1.2. Motherboard
The motherboard is where all other components connect. It must be compatible with your CPU and other parts like RAM and the graphics card. ATX motherboards are ideal for gaming as they provide enough expansion slots.
1.3. RAM (Memory)
For gaming, at least 16 GB of RAM is recommended. DDR4 is the most common, although DDR5 is gaining traction in 2024, offering higher speeds and performance.
1.4. Graphics Card (GPU)
The graphics card is essential for gaming. GPUs from Nvidia or AMD, like the RTX 4060 or Radeon RX 7600, are excellent for 1080p and 1440p gaming. For 4K gaming, look for more powerful options like the RTX 4080 or RX 7900 XT.
1.5. Storage (SSD or HDD)
SSDs are the best option for gaming due to their fast read and write speeds. A 1 TB SSD offers plenty of space for games and programs. HDDs can be used for secondary storage.
1.6. Power Supply (PSU)
Choose a quality power supply with an 80 Plus certification for energy efficiency. A 650W to 750W PSU is sufficient for most gaming setups.
1.7. Case
The case should not only look good but also be functional. Ensure it has good airflow and enough space for all your components. ATX cases are the most common for gaming PCs.
1.8. Cooling System
If you’re not overclocking, the stock CPU cooler might suffice. If you want better thermal performance, consider a high-quality air cooler or an AIO liquid cooling system.
Step 2: Assembling the Gaming PC
2.1. Prepare Your Workspace
Before starting, make sure you have a clean and well-lit workspace. Use an anti-static wrist strap or discharge static by touching a metal surface.
2.2. Install the Power Supply (PSU) in the Case
Start by installing the power supply at the bottom of the case (most modern cases have this layout). Ensure the PSU fan is facing downward if your case has a bottom vent.
2.3. Install the CPU on the Motherboard
- Open the CPU socket on the motherboard.
- Place the CPU into the socket, aligning the corner markers.
- Close the socket cover and ensure it is securely locked.
2.4. Install the CPU Cooler
If you’re using an air cooler, make sure to apply thermal paste (if it’s not pre-applied). Place the cooler on top of the CPU and secure it with screws. For liquid cooling, install the water block onto the CPU first, then mount the radiators and fans in the case.
2.5. Install the RAM
Insert the RAM modules into the appropriate slots on the motherboard. Ensure they click into place properly.
2.6. Mount the Motherboard in the Case
- Install the I/O shield (backplate) in the case.
- Align the motherboard with the standoffs in the case and secure it with screws.
2.7. Install the Graphics Card (GPU)
- Remove the necessary PCIe slot covers from the case.
- Insert the graphics card into the PCIe slot on the motherboard.
- Secure the GPU to the case with screws.
2.8. Install Storage (SSD/HDD)
Install the SSD or HDD into the storage bays of the case and connect them to the motherboard using SATA or NVMe cables, depending on the type of drive.
Step 3: Connecting Cables and Cable Management
3.1. Connect the Power Supply to the Components
Connect the PSU cables to the motherboard, GPU, storage, and any other components that need power. Be sure to connect the 24-pin cable to the motherboard, the 8-pin cable to the CPU, and the additional power connector to the GPU.
3.2. Organize the Cables
Good cable management improves airflow and makes future maintenance easier. Use zip ties to tidy up the cables behind the motherboard tray.
Step 4: First Boot and System Setup
4.1. Check All Connections
Before powering on your PC, double-check that all components are properly connected. Ensure that power cables, fans, and storage drives are all securely in place.
4.2. Power On and Access BIOS
Connect your monitor, keyboard, and mouse, then power on the PC. If everything is working correctly, you should see the BIOS screen. Here, you can configure RAM speeds and ensure the motherboard detects all components properly.
4.3. Install the Operating System
Once everything is set up in the BIOS, insert the USB drive with your operating system installer (such as Windows or Linux) and follow the instructions to install it on your SSD or hard drive.
Conclusion
Building a gaming PC from scratch may seem daunting at first, but by following this step-by-step guide, you’ll be able to assemble a custom, optimized rig for your gaming needs. Make sure to research your components well and keep your system well-cooled and clean to ensure long-lasting performance.


